
How To Add A Fire To A Fireplace In Photoshop
Adobe Photoshop is an extremely powerful editing program that is considered the industry standard in the real estate photography industry. We even named it the Best Editing Software for Real Estate Photography and for very good reasons.
In this article I’ll share how to add a fire to a fireplace in Photoshop and share step by step directions that you can follow.
Table of Contents
Adding A Fire To A Fireplace In Photoshop
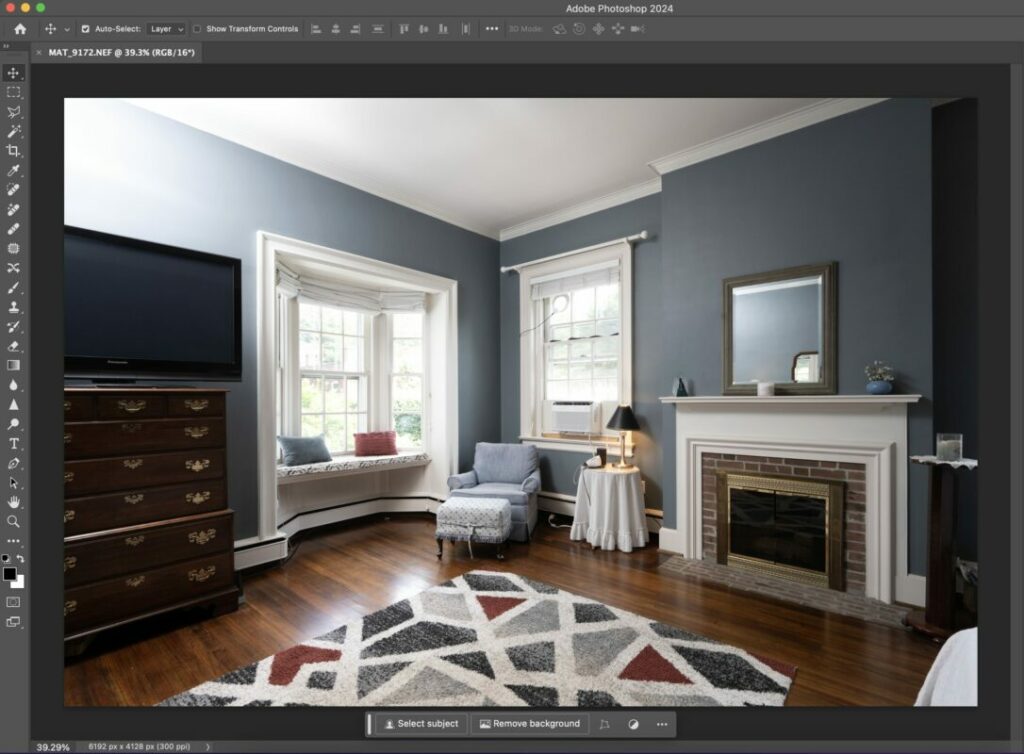
I’ll be adding a fire to the fireplace in the photo above for this example and tutorial. You’ll need a photo of a fire to add to the image, whether it’s a jpg, png, or any other type of file.
You’ll also want to make sure that the fire itself will look natural in the fireplace. It’s for this reason that you should have a few different stock fires to choose from. I have a stock collection of about six different fire images which have worked for me in every situation.
Pick The Fire And Open It In Photoshop
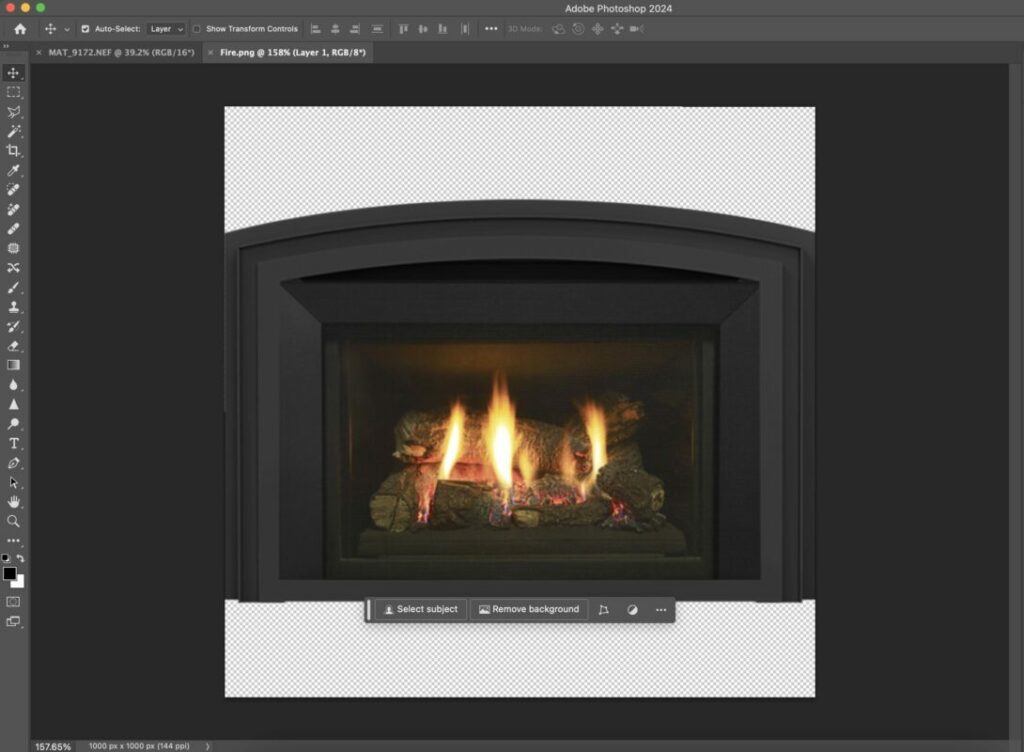
This is the fire that I picked to create the final image. I opened it in Photoshop and will now drag it on to the image itself.
To achieve this, hold down SHIFT and pull the image of the fire itself on to the final image.
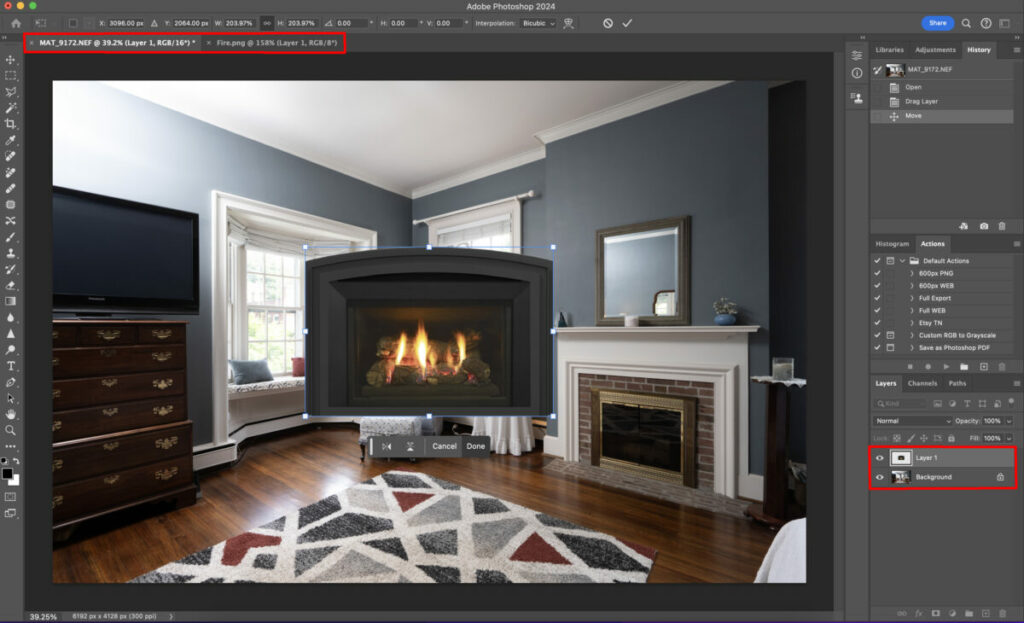
Once you drag the image of the fire on to the image that you want to use it on, you’ll see that you now have two layers open.
Reference the areas highlighted in red in the image above. You’ll see in the lower right that there are two layers. One layer of the fire, titled ‘Layer 1’, and one of the image itself, titled ‘Background’.
It’s very important that there are two separate layers so that you can move and adjust the fire independently from the final photo.

After you have your fire as it’s own layer, you’re going to want to choose the SCREEN function which will help to make the fire look much more natural and blend in seamlessly with the background.
You can see exactly where to find this menu function by referencing the red highlighted area in the image above.
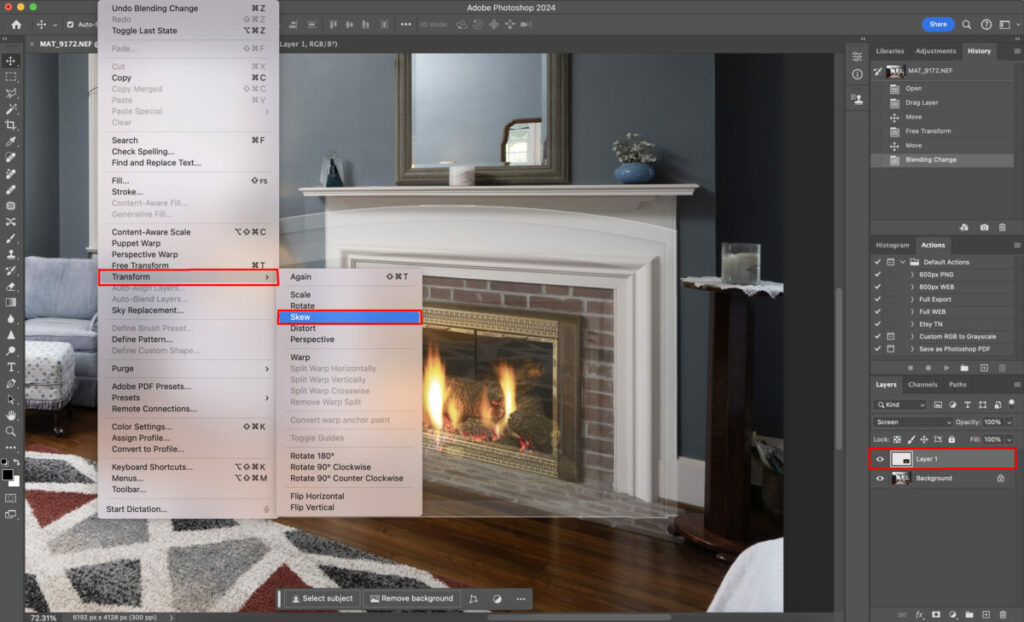
Now that you have used the SCREEN function to have the fire blend naturally into the photo, you’ll want to fit it perfectly into the fireplace itself.
To do this, you’re going to use the SKEW tool. I’ve mentioned the SKEW tool in other articles before since it’s one of my most used tools in Photoshop for real estate photography.
You can navigate to the SKEW tool by clicking the EDIT menu, scrolling down to TRANSFORM, then selecting SKEW.
You can follow these steps by referencing the red highlighted areas in the photo above.
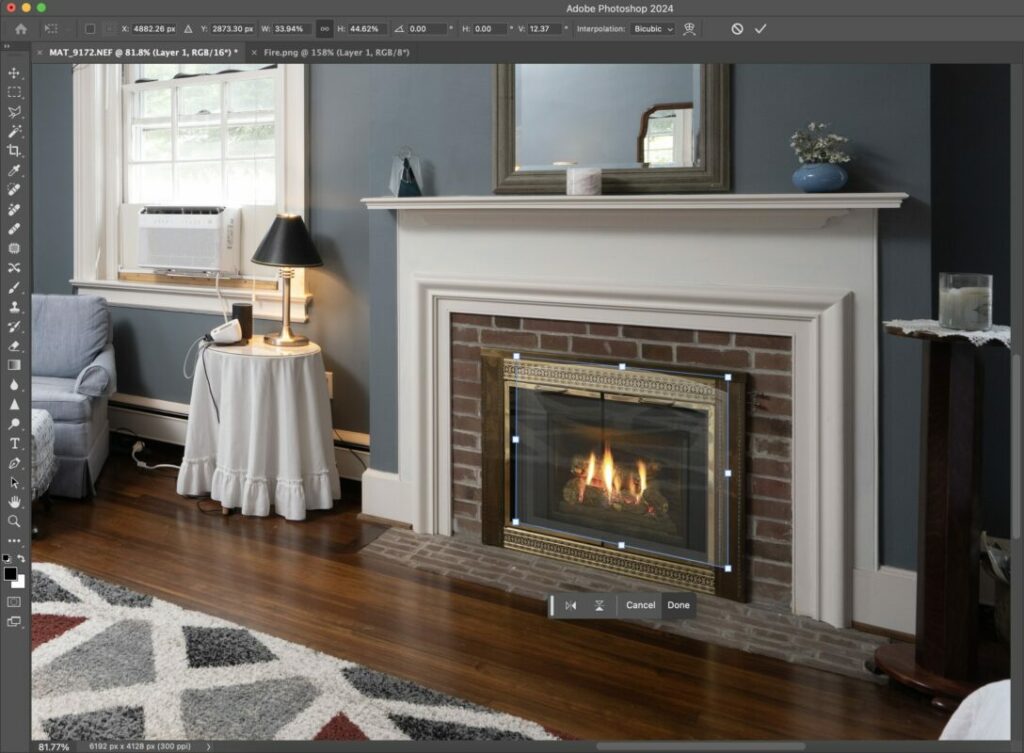
Use the Skew Tool to fit the fire in the fireplace in a natural way. Play around until you think it fits comfortably in the fireplace and looks as natural as possible.

The final step that you’ll need to do is to remove the parts of the fire image that you don’t want included in your final image. You can do this a number of different ways, but I like to use the Polygonal Selection Tool to select the area around the interior of the fireplace, then delete it.
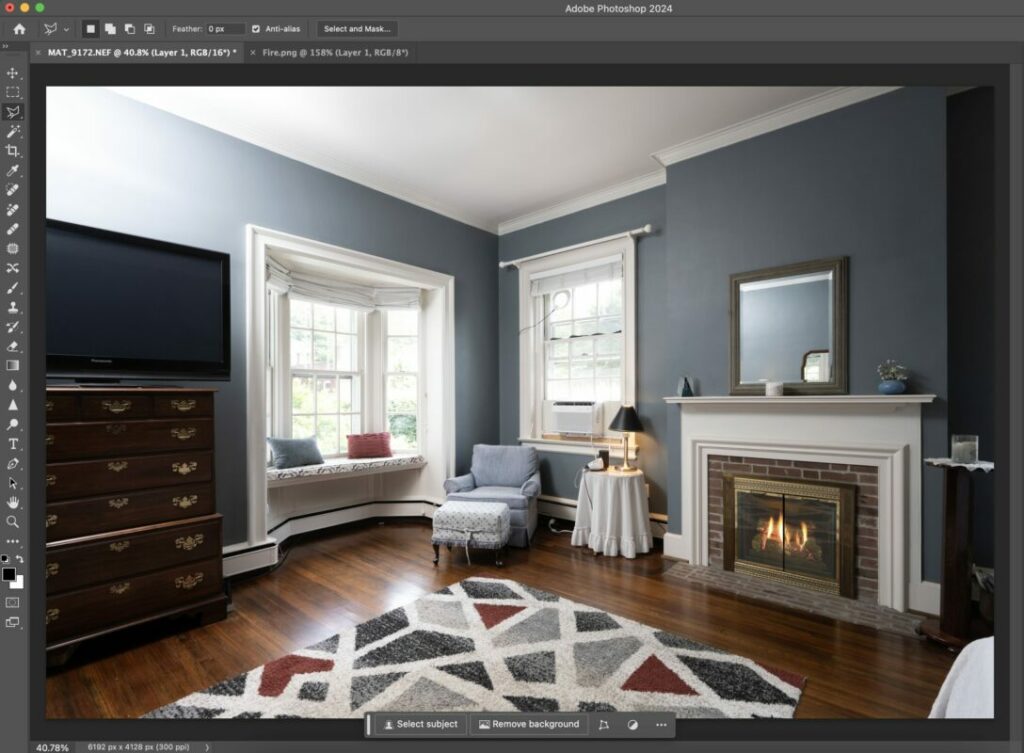
Once you hit the delete button, you’ll have your look at the final image.
As you practice this technique more and more, you’ll start to get very good at adding fires to fireplaces in Photoshop. I can complete this technique in about one to two minutes and it’s become basically second nature for me.
As long as you have a decent collection of fire stock images so you have one that will look natural for various images, you shouldn’t have a problem.
Additional Resources
If you’re just getting started in real estate photography, check out our Beginners Guide. It’s full of helpful articles and tips that will guide you in the right direction as you begin your real estate photography journey.
You can check out our Gear section as well to see reviews and recommendations on the latest real estate photography gear.
If you’re more interested in other resources that can help your real estate photography business, check out our Business Resources page.