
Utilizing The Skew Tool In Photoshop For Real Estate Photography
Editing is a key part of any successful real estate photography business and fixing vertical lines is one of the first editing techniques that is necessary to learn.
In this article I’ll show you how to properly utilize the skew tool in Photoshop for real estate photography and explain why it’s such a great tool to get comfortable using.
Table of Contents
What Is The Skew Tool?
Adobe Photoshop is one of the best photography editing tools on the market and has been for quite some time. We even name it the Best Editing Program for Real Estate Photography and for very good reasons.
The skew tool is one of so many tools within Photoshop, but it’s extremely important and relevant when editing real estate photography. It’s best use is to fix vertical and horizontal lines in real estate images to make sure everything looks straight and proper.
How To Use The Skew Tool For Real Estate Photography
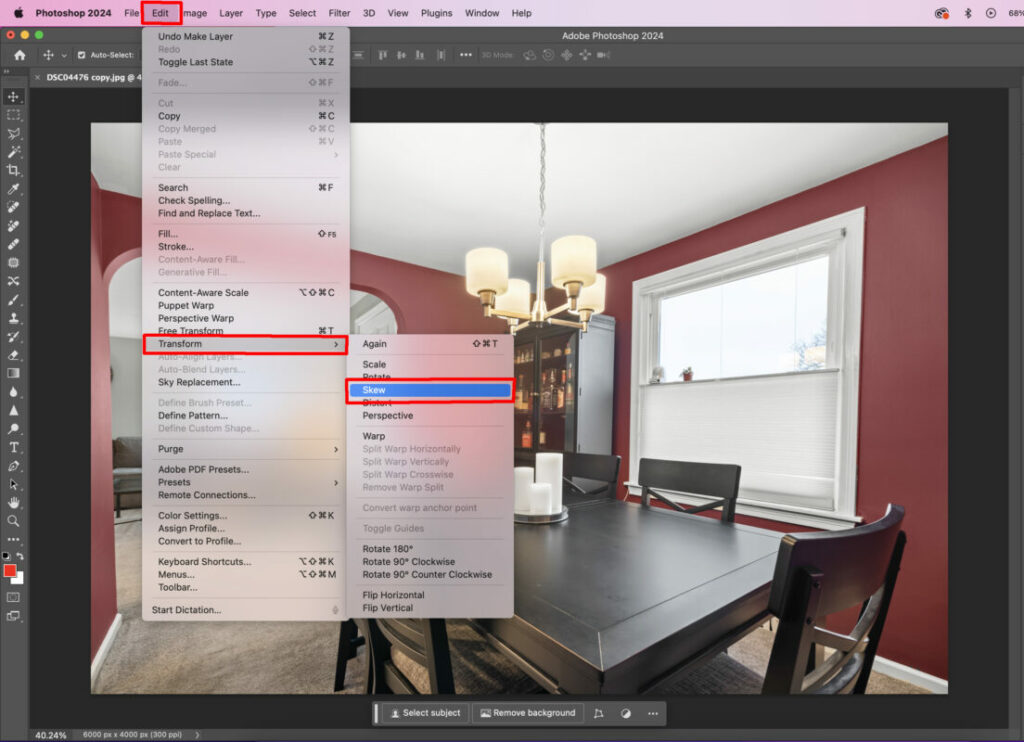
To start, you’ll need to know where to find the skew tool. Once you have your image open in Photoshop, click the EDIT menu, scroll down to the TRANSFORM menu, then click SKEW.
You can see the exact process by referencing the red highlighted selections in the above photo.
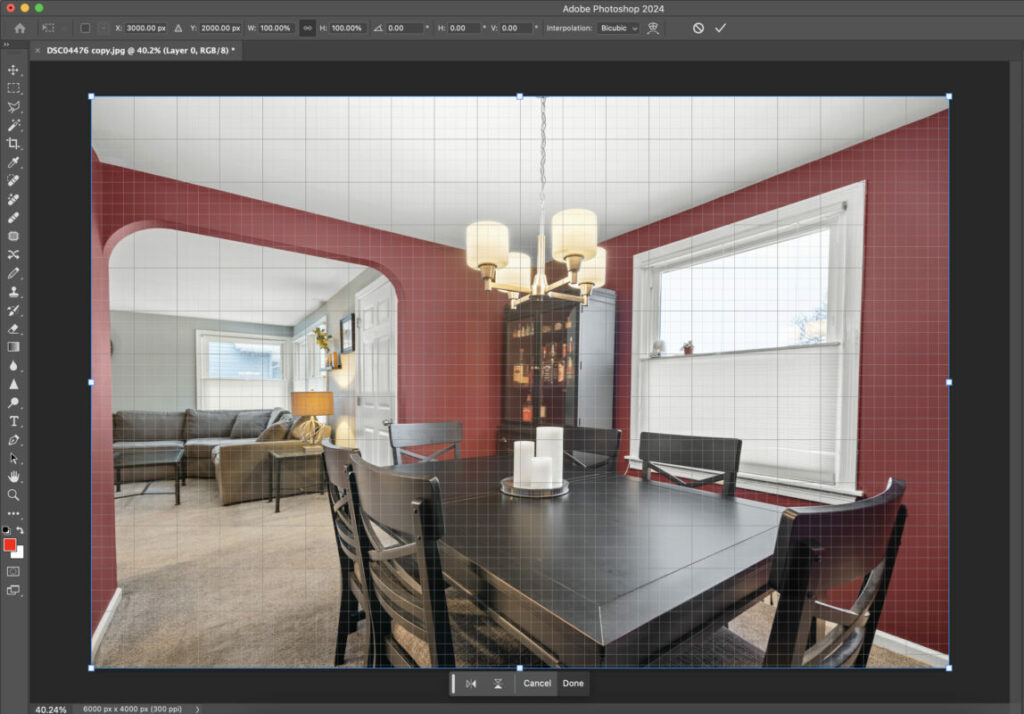
One you click skew, you’ll be able to start to drag the corners of the image in order to better align them.
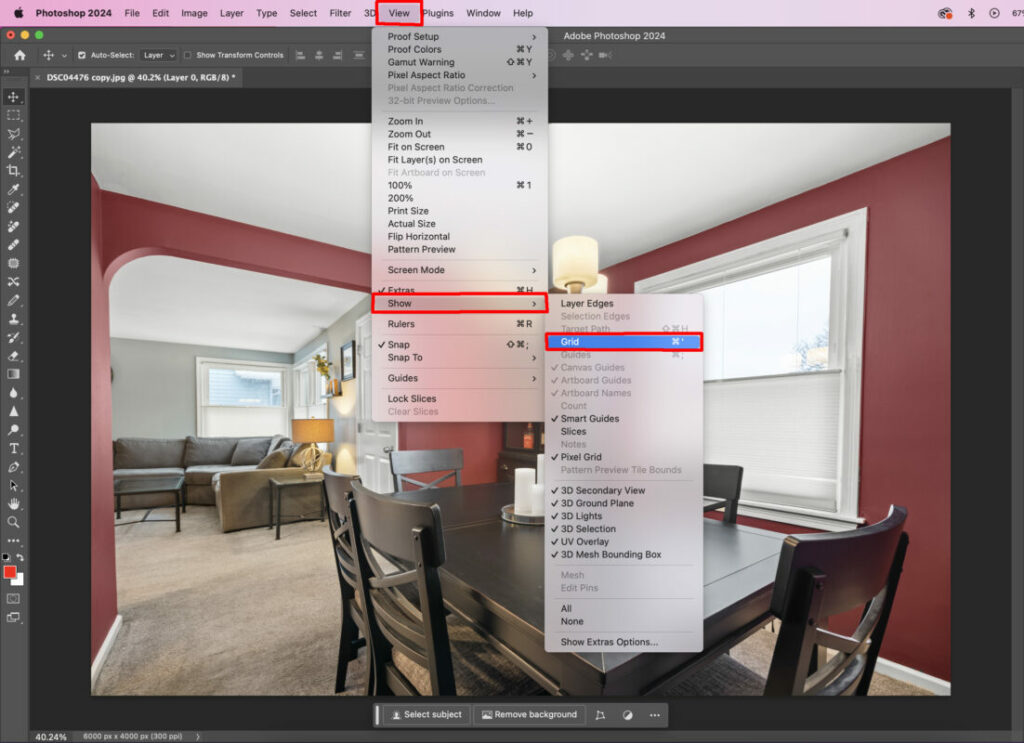
Next you’ll want to bring up the grid view like you see in the image above. You can do this by going to the VIEW menu, scrolling down to the SHOW menu, and then selecting GRID.
You can follow those exact steps by referencing the red highlighted selections in the image below.
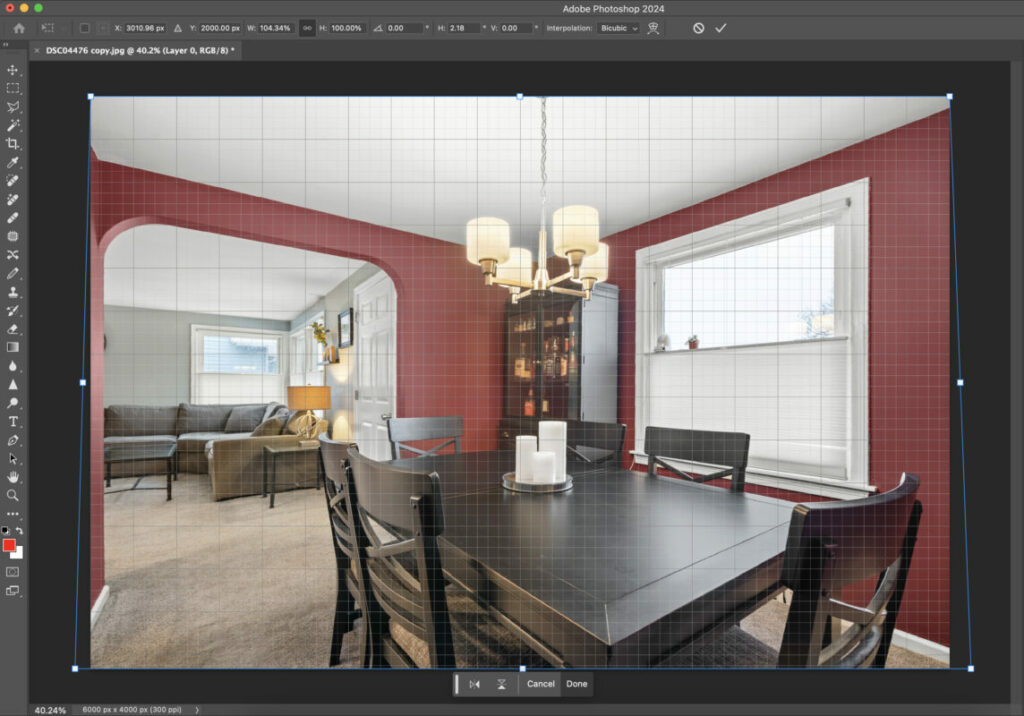
Now that you have selected the skew tool and brought up the grid pattern to better be able to align your horizontal and vertical lines, you can start to use the skew tool for it’s purpose.
In the image below, you’ll see that I pulled the lower portions of the image further out in order to make the vertical lines staright.
Prior to using the skew tool for this purpose, all the vertical lines, especially the ones towards the edge of the image, were not perfectly vertical.
Purposes Of The Skew Tool
For real estate photography, the purposes of Photoshop’s skew tool are very apparent. You can easily correct vertical and horizontal lines.
In order to correct horizontal lines in your image, you can follow the exact same steps as the ones outlined above, but when it comes time to pull the image, you’ll pull it up and down, rather than right and left.
The speed, reliability, and ease of Photoshop’s skew tool makes it an incredible powerful and helpful tool for all real estate photographers.
Additional Resources
If you’re just getting started in real estate photography, check out our Beginners Guide. It’s full of helpful articles and tips that will guide you in the right direction as you begin your real estate photography journey.
You can check out our Gear section as well to see reviews and recommendations on the latest real estate photography gear.
If you’re more interested in other resources that can help your real estate photography business, check out our Business Resources page.