
Best Way To Utilize An Off Camera Flash In Real Estate Photography
By harnessing the power of an off camera flash, you can better control the lighting, enhance your images, bring out architectural details, and create more depth in your photos.
In this article, I’ll discuss the best practices and techniques for utilizing an off-camera flash in real estate photography. This will help you understand the potential that off camera flashes bring to the table.
Table of Contents
What Counts As An Off Camera Flash?
An off camera flash is exactly what it sounds like; a flash that you’re utilizing for lighting the photo that is not attached to your camera.
Lots of real estate photographers will use an on camera flash to get a pop of light that helps with color correction and lighting the dark areas of a room. However, on camera flashes always end up lighting the frame from the same angle.
Off camera flashes give you the ability to direct the light exactly as you see fit to highlight the best portions of the room. It gives you more control and allows you to be more creative.
Using an off camera flash, you’ll get a drastically different result than you would with an on camera flash.
Currently, the best off camera flash is the AD200 Pro, which provides a real estate photographer with everything they could need in a flash. Check out our AD200 Pro Review to see why it’s the perfect flash for real estate photography.
For more information of what the best on and off camera flashes are for real estate photography, check out our article Best Flashes for Real Estate Photography.
How To Position An Off Camera Flash
The position of your off camera flash is going to be extremely important. It will determine where the light from the flash will end up and therefore will determine the entire look and feel of the photo.
Using an off camera flash can be thought of as light painting in a way. You want to make sure you’re controlling the light perfectly so you get your desired result.
Example 1
The two photos below show the difference that an off camera flash just off to the side of the frame can achieve.
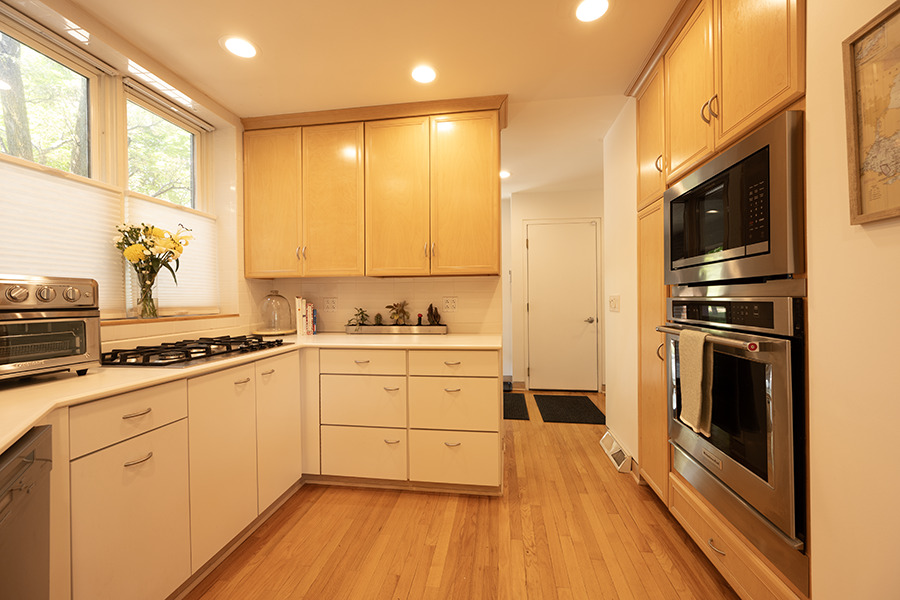
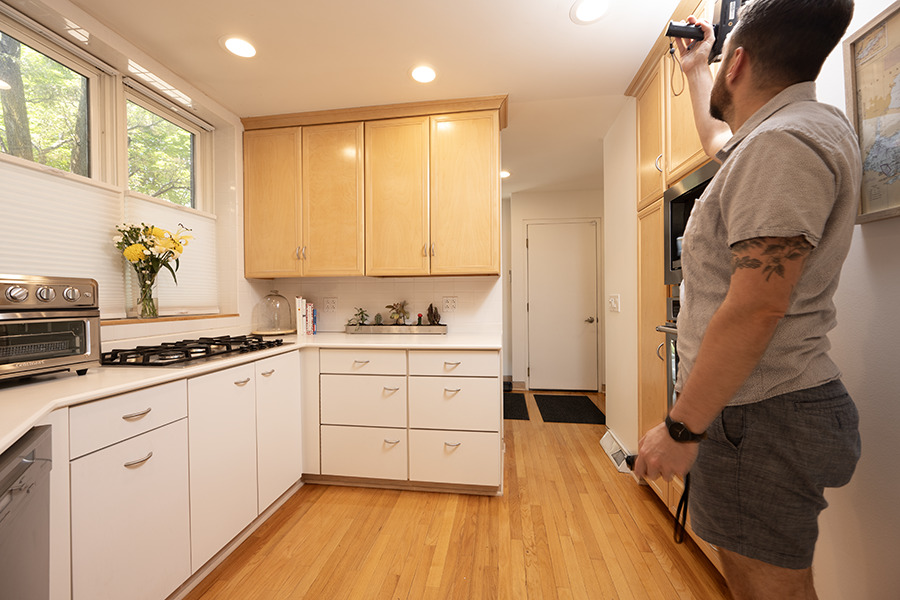
You can quickly notice that the color in the bottom photo is much better and more correct than the top photo. This is because I was bouncing the flash off of a white ceiling, causing the light to diffuse nicely and bring out the true color of the cabinets.
Also, you can see that the cabinets just simply look better since the light if hitting them from a completely different position. There’s more depth and the details are much more noticible.
Example 2
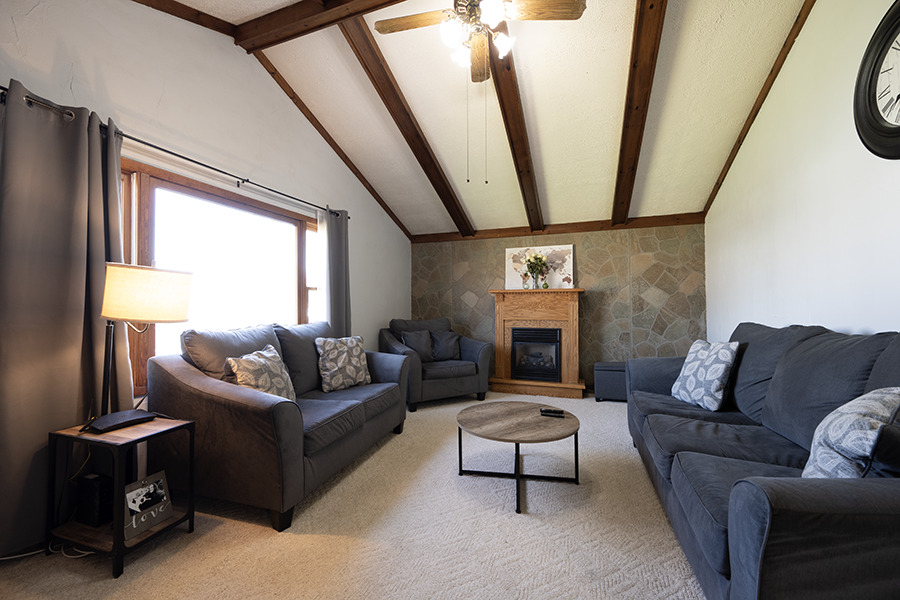
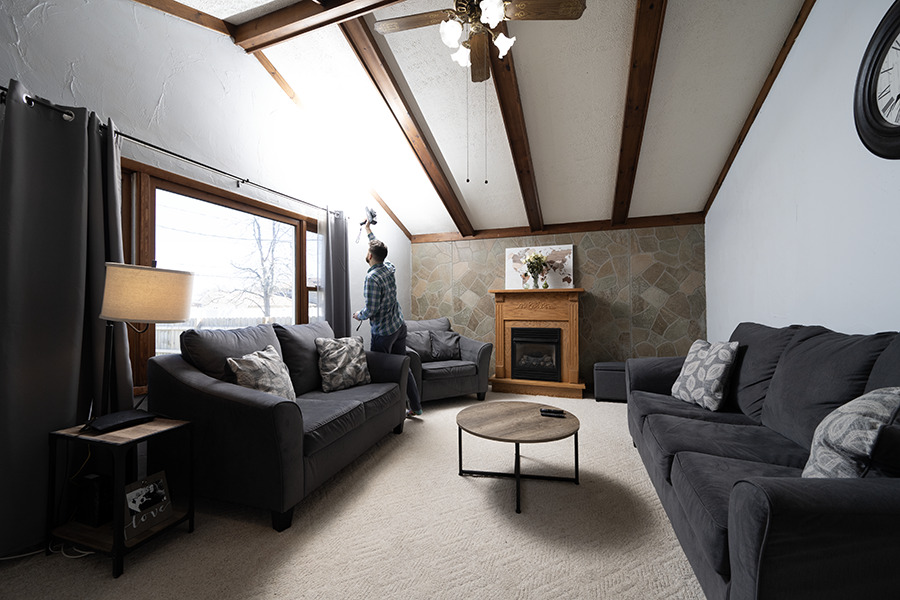
In the two photos above, you can see that I used the off camera flash to accent the natural light that was coming in from the window. When compared to the first photo, the differences are clear.
Using the off camera flash just above the windows and bouncing the light off a white ceiling caused the entire right side of the frame to be lit much better than in the first photo.
The fireplace and couch in particular look a lot better than they do in the photo with ambient light only.
Utilizing Off Camera Flashes To Their Largest Potential
As you can see in both examples above, off camera flashes work best when you position them off to the side of the frame. This creates an image with much more depth an detail than one taken with an on camera flash.
It’s important to understand how light hitting objects in the room cause them to look. When the light is coming from on top of your camera, it can cause the photo to look quite flat.
By positioning the flash to the left or right of the frame, you won’t experience the flat lighting since the light is coming from a completely different position.
For more tips about using a flash, check out our article 4 Tips to Better Use a Flash in Real Estate Photography.
Additional Resouces
To learn more about lighting for real estate photography and what some of the best general practices are, check out our article Best Lighting for Real Estate Photography.
If you’re just getting started in real estate photography, check out our Beginners Guide. It’s full of helpful articles and tips that will guide you in the right direction as you begin your real estate photography journey.
You can check out our Gear section as well to see reviews and recommendations on the latest real estate photography gear.
If you’re more interested in other resources that can help your real estate photography business, check out our Business Resources page.