5 Basic Tips For Using The Masking Tool In Adobe Lightroom
As real estate photographers, one of the most powerful tools at our disposal in Adobe Lightroom. We even named it The Best Editing Program for Real Estate Photography.
In this article I’ll share 5 basic tips for using the masking tool in Adobe Lightroom, which is sure to help you take your edits to the next level.
Table of Contents
1. Understand The Basics

What is Masking?
Masking in Lightroom is a technique that allows you to apply edits to specific parts of an image while leaving other areas unaffected. It works by creating a ‘mask’ over your chosen area, which can be adjusted for opacity and feathering, allowing for seamless blending.
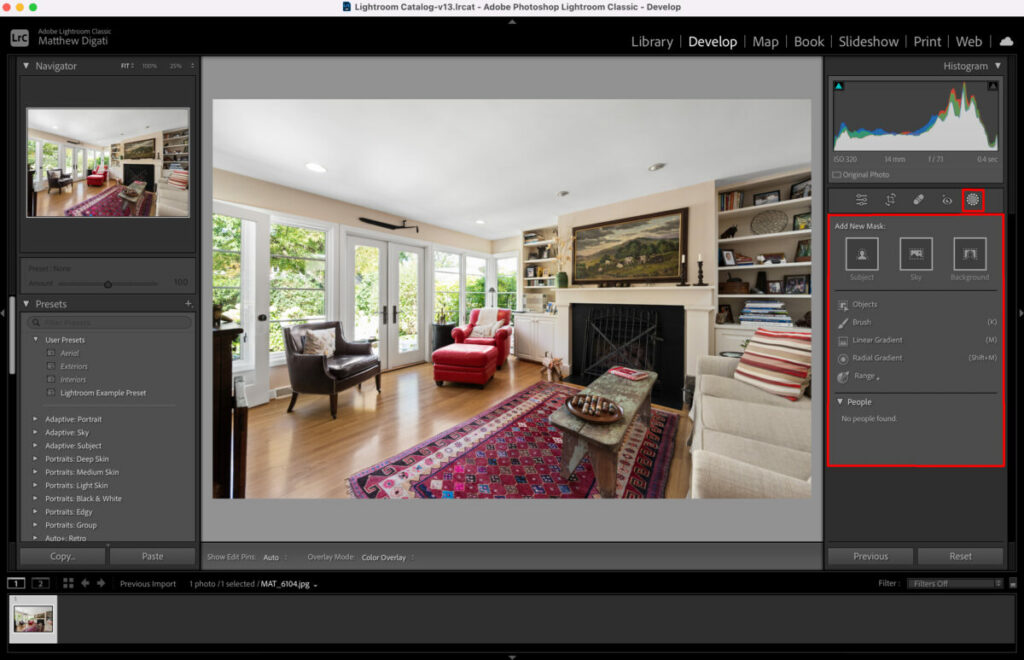
You apply masks to the image by using the Masking Tool, which you can see highlighted in red in the photo above.
Types of Masks
Lightroom offers various types of masks, including brush masks, gradient masks, and radial masks, each suited for different purposes.
Brush masks are ideal for freehand adjustments, gradient masks for gradual changes like skies or floors, and radial masks for focusing on specific objects like light fixtures or artwork.
2. Make Exposure Adjustments
Balancing Interior and Exterior Light
One of the common challenges in real estate photography is balancing the exposure between the interior and the view through a window. Using a graduated or brush mask, you can selectively adjust the exposure in these areas, ensuring both the interior and the view outside are correctly exposed.
Highlighting Architectural Details
Real estate photos often need to emphasize architectural features like crown moldings, fireplaces, or built-in shelves. You can use a brush mask to subtly increase the exposure or clarity of these features, making them stand out in the final image.
3. Quick Color Correction
Adjusting Specific Color Zones
In some real estate photos, certain colors may appear off due to lighting conditions or reflections. With the masking tool, you can target these specific color zones and adjust the hue, saturation, or luminance to ensure they align with the true colors of the property.
Creating Mood with Color
Masking can be used to create or enhance the mood in a room. For instance, a warmer tone can be applied to a living room area to make it feel more inviting, or a cooler tone to a bathroom for a crisp, clean look.
4. Enhance Room Depth and Dimension
Drawing Attention to Depth
In real estate photography, conveying the depth and spaciousness of a room is crucial. You can use radial masks to subtly brighten the center of a room, leading the viewer’s eye inward and creating a sense of depth.
Adding Dimension to Flat Images
Some real estate photos can appear flat due to uniform lighting. Using brush masks to selectively adjust shadows and highlights can add dimensionality, making the space more dynamic and appealing.
5. Experiment with Opacity
Blending Edits Naturally
The key to making your masked edits look natural is in the feathering and opacity settings. Feathering softens the edges of the mask, allowing the adjustments to blend seamlessly with the rest of the image.
Controlling the Impact of Adjustments
Adjusting the opacity of your mask can control the impact of your edits. In real estate photography, subtlety is often key. Gradually increasing or decreasing the opacity can help you achieve the desired effect without overdoing it.
Practical Applications in Real Estate Photography
Spotlighting vs. Global Adjustments
Use the masking tool to spotlight specific areas of a property, such as a beautifully designed kitchen island or an elegantly staged living room. These focal points can significantly enhance the property’s appeal in the listing.
Correcting Problematic Areas
Real estate photos sometimes have problematic areas like glare on glossy surfaces or distracting shadows. The masking tool allows you to target and correct these issues without affecting the rest of the image.
Enhancing Outdoor Spaces
For exterior shots, use gradient masks to enhance skies or brush masks to bring out the textures in landscaping. These outdoor elements are crucial in real estate photography, as they contribute significantly to a property’s curb appeal.
Additional Resources
If you’re just getting started in real estate photography, check out our Beginners Guide. It’s full of helpful articles and tips that will guide you in the right direction as you begin your real estate photography journey.
You can check out our Gear section as well to see reviews and recommendations on the latest real estate photography gear.
If you’re more interested in other resources that can help your real estate photography business, check out our Business Resources page.
