How To Create A Preset In Lightroom
Presets are an extremely helpful function that can save real estate photographers tons of time on the editing end. We named Adobe Lightroom the Best Editing Software for Real Estate Photographer, so it’s not a surprise presets are such a helpful feature.
In this article I’ll briefly explain what a Lightroom preset is and share how to create a preset in Lightroom.
Table of Contents
What Is A Lightroom Preset?
A Lightroom preset is essentially a configuration of settings, designed to achieve a particular look or style in a photograph, which can be applied with a single click.
These presets can include adjustments to exposure, contrast, color balance, and more, tailored to suit specific shooting conditions or aesthetic preferences.
The point of a preset is to save you tons of time. You can apply custom settings to tons of photos instantly, saving you literally hours of editing work.
How To Create A Lightroom Preset
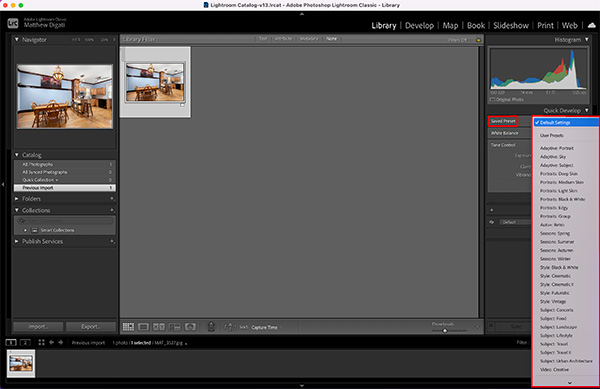
The first thing you need to do is open Adobe Lightroom and choose an image which you’re going to apply the preset to. The image itself doesn’t exactly matter, since you’re just going to be applying the settings and then saving them as a preset.
You’ll see in the image above that the menu of presets if highlighted in red. It’s under the ‘Quick Develop’ menu and you’ll see that Lightroom comes with a huge variety of presets already loaded.
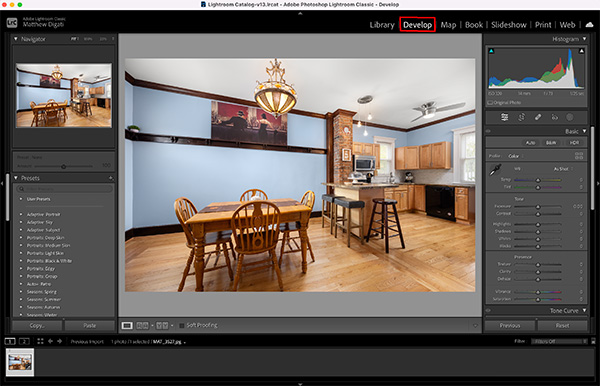
The next step in the process if going to be to move into the ‘Develop’ work space which you can see highlighted in red in the photo above.
This is where you are going to apply the settings to your image that you want to save as a preset.
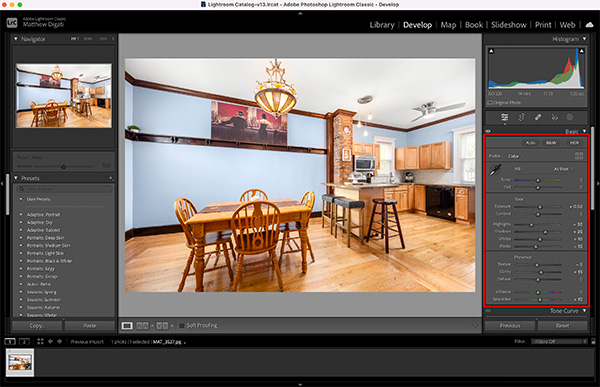
You can see that I choose to apply several different settings to this photo, which you’ll see highlighted in red, that are going to become the preset.
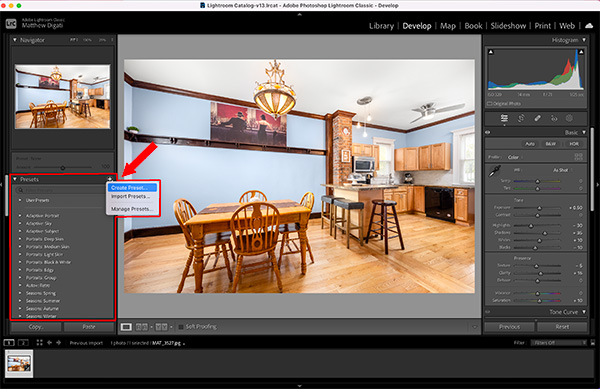
To the left of the Lightroom work space you’ll see the ‘Presets’ menu. At the top of this menu, you’ll see a ‘+’ and when you click it you’ll see an option to ‘Create Preset’
All of this is highlighted in red above. You can go ahead and click ‘Create Preset’ when you have all of the settings applied to the image.
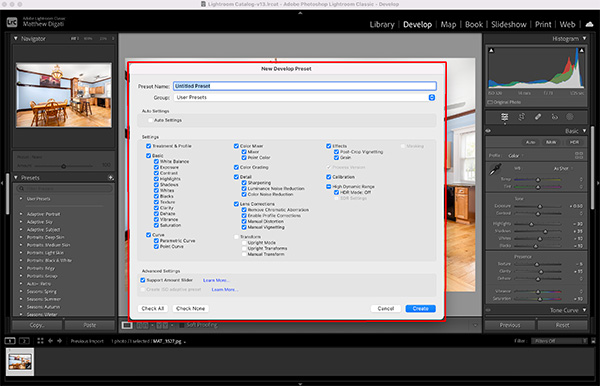
Once you click ‘Create Preset’ a large menu will pop up titled ‘New Develop Preset’. This is the menu where you can choose which of the applied settings you want to include or not include.
Chances are you’re going to want to include all of the setting changes you made, so there is no reason to make any selection.
The only thing you’ll need to do is title your preset and click ‘Create’.
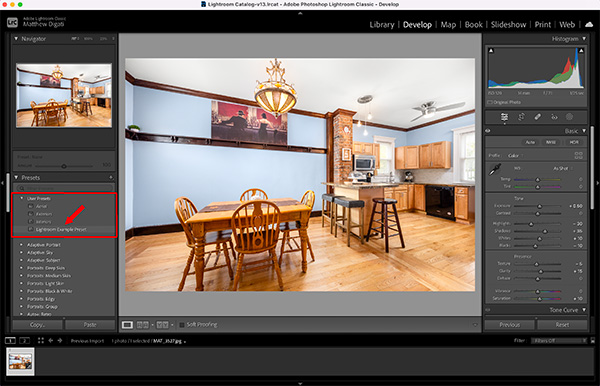
Once you click ‘Create’ You’ll have officially finished creating a Lightroom preset. I chose to title mine Lightroom Example Preset, which you can see highlighted in red above.
The preset you created will show up under the preset menu, then within the ‘User Preset’ dropdown menu.
Additional Resources
If you’re just getting started in real estate photography, check out our Beginners Guide. It’s full of helpful articles and tips that will guide you in the right direction as you begin your real estate photography journey.
You can check out our Gear section as well to see reviews and recommendations on the latest real estate photography gear.
If you’re more interested in other resources that can help your real estate photography business, check out our Business Resources page.
